Script Werx makes it easy to:
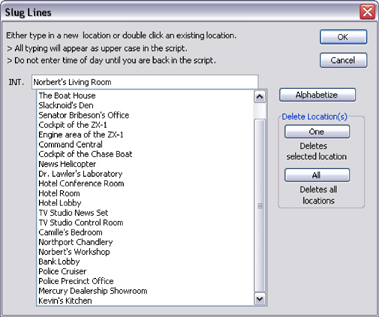
- Work from a self-generated list of locations (slug lines) that let you click on a previously-used location to use it again
- Automatically repaginate an entire screenplay with the option of adding MOREs or CONTINUEDs
- Add Scene numbers that update automatically as you write and can then be locked against changes when reformatting into a shooting script. New scenes are then designated as A-B scenes
- Add scene numbers in both margins and on CONTINUEDs
- Create A-B pages to lock in page numbering
- Enter parenthetical directions, dual dialogue or designations for (O.S.), (V.O.) or (continuing) by clicking on a toolbar or pressing a single key combination
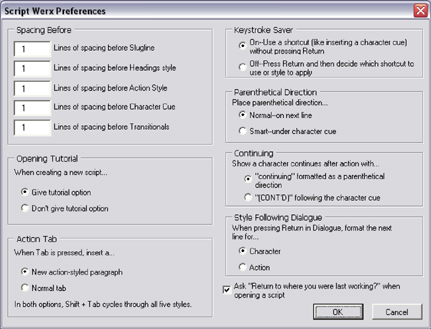
- Adjust spacing before slug lines, action, shots, characters and transitionals, all from a single dialog box that accepts full or fractional lines of spacing
- Collapse your script down to slug lines only and then click and drag to change scene order
- Import and format existing scripts
top of page
Sample Scripts
 For a sample script demonstrating Script Werx features, click on the format you want to see. These samples are in the pdf (Adobe Acrobat) format which requires an Acrobat reader; available for free by clicking the Adobe link at the bottom of this list: For a sample script demonstrating Script Werx features, click on the format you want to see. These samples are in the pdf (Adobe Acrobat) format which requires an Acrobat reader; available for free by clicking the Adobe link at the bottom of this list:
Requires Adobe Acrobat reader
top of page |
|
How They Work
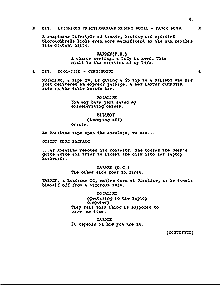
Script Werx anticipates your needs. Within a scene, simply pressing the Return key will automatically apply all appropriate formatting. Here's how easy it is to start a new script:
- Within Microsoft Word, from the File menu select New.
- From the list of templates that appears, select the format you prefer.
- A new script will appear complete with a cover sheet, your cursor will be placed below the FADE IN: line.
- Click either the INT or EXT button on the Script Werx toolbar.
- In the dialog box that opens, enter your first slug line (scene heading) and click OK. This slug line will appear in your script, properly formatted in all caps.
- Pressing Return will move your cursor to the next line, which will be properly formatted for writing action.
- When you are ready for your first dialogue, click a blank button on the Character toolbar. A dialog box will open, into which you type the name of your character. A button showing that character name will now appear on the toolbar.
- Click the name on the toolbar and a properly formatted character cue will appear in your script, with your cursor poised for you to write your dialogue.
- Pressing Return will take you into the Action style. Or when you have other names on the Character toolbar, you may click on them to continue writing dialogue.
- An abundance of other tools makes it easy to write parenthetical directions, indicate off-screen dialogue, add transitions or perform any of the other formatting chores that would otherwise require stopping to research both what the industry standard for that element might be and how to trick MS Word into doing it for you.
- You continue writing, selecting slug lines from the growing lists that remember every slug line you have already used and selecting character names from a toolbar; or pressing keyboard shortcuts if you prefer.
|


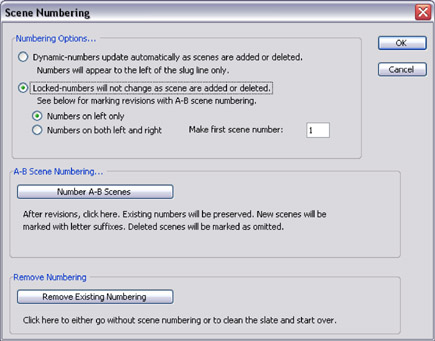 When you're ready to format your reading script into a shooting script, Script Werx lets you easily apply the type of scene numbering you need. Scene numbers can be locked in at any time and revisions can be tracked with A-B suffixes. Deleted scenes are marked in the script as omitted.